The best shapes to apply metal Photoshop Styles
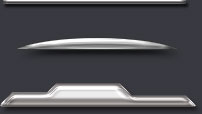
Besides you can apply Photoshop styles to any shape, the shining edge effects of the metallic styles will be specially visible near the edge of the shape. Here are a few tricks that will make your metal effects specially appealing:

- Draw thin shapes: when the edges are close, the metal edge effects become more intense.
- Create smooth corners to render curved metal and shining chrome effects.
- Use straight lines with sharp angles and indentations: each cut in the shape will add a chrome edge effect when used with a metallic Photoshop style.
Drawing shapes with Photoshop to create curved metal edge effects
As the name suggests, Photoshop layer styles are applied to whole layers. So the idea is to keep each shape on a different layer. The shortcut to create a new layer in Photoshop is CTRL + SHIFT + N
The polygonal lasso tool (L) is one of the best options to create angled shapes, very appropriate for modern looking interfaces.
Once you have created a selection with the shape you like, just fill it with any color, by pressing the shortcut CTRL + Backspace. Then apply the style by clicking on the Photoshop style icon.

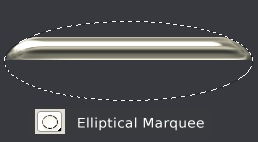
A quick and easy way to create a shape with rounded edges is to use Photoshop’s elliptical marquee tool (which can be selected pressing CTRL + M). The idea is to select parts of an existing shape, and then cut them away by pressing DEL key.

If you want to create convex edges instead, remove the outer part of the existing shape by inverting your elliptical selection (using the shortcut CTRL + I).
Photoshop’s pen tool: the professional way to draw Photoshop shapes
![]() Probably, the most professional option to create a curved shape is to use Photoshop’s pen tool (shortcut: P). If you are familiar with other vector graphics software (such as Adobe Illustrator or Adobe Flash), using Photoshop’s pen tool will be easy.
Probably, the most professional option to create a curved shape is to use Photoshop’s pen tool (shortcut: P). If you are familiar with other vector graphics software (such as Adobe Illustrator or Adobe Flash), using Photoshop’s pen tool will be easy.
Here are some tips to draw Photoshop vector shapes as the basic shape for your Photoshop metallic style:
 Click to define a shape control point, and drag the pen while doing so to adjust the vector handlers (which are the tangents of the curve).
 Don’t use too many control points in your shape: a few control points will do the trick adjusting the handlers carefully. For example, you just need 4 control points (with little handler tweaking) to create a circumference.
 If you hold SHIFT you will create straight lines. Don’t drag when defining new controls points, and you will create a polygonal, straight-edged shape, similar to the shape that we recently created with the polygonal lasso.
 Holding ALT while using the pen tool will allow you to break the tangent, so you can move separately each one of the two handlers in a single shape control point. This is the way to create sharp curve edges.
- Holding CTRL while you are still drawing a shape using the pen will temporarily switch to the direct selection tool, so you can click any control point, drag the point to a new position, release CTRL, and continue creating more control points for your active Photoshop shape.
 If you want to create a shape with smooth edges and soft corners, don’t place control points very close, don’t break the tangency, and don’t use very long handlers.
![]() Alright, now that we have seen how to create shapes for metallic edge effects, let’s move on to create the main shapes of an interface.
Alright, now that we have seen how to create shapes for metallic edge effects, let’s move on to create the main shapes of an interface.

