Create chrome reflections and metals in Photoshop: silver satin effects
As we are trying to create a layer style depicting realistic chrome in this tutorial, we should ask ourselves: what makes a surface look like a metallic chrome surface? The answer is simple: the reflections of the environment.
Chrome, silver and all shining metals are nearly mirror surfaces which reflect every object around them. The reflected objects look like blur effects or shapeless areas that contrast against an usually desaturated gray background.
That’s why a Photoshop chrome layer style should automatically generate distorted, nearly abstract and random reflections of an imaginary environment.
But, how do we create these reflections in Photoshop? We have just seen the 2 main techniques using the light and shade options of Photoshop bevel. Nevertheless, the Photoshop bevel effect that we just explained in this tutorial concentrates the lighting effects only near the edges of the shape, and so does the gloss effect.
Fortunately, there’s also another layer blending option in Photoshop that will solve this problem, creating metallic reflections like chrome or silver: satin effects.
The main advantage of such satin effects is that these lighting effects may show up in the whole surface of your piece of silver metal.
Combine wisely both layer style options, bevel and satin, and you will create interesting reflections in the edges and in the center of your metallic silver shapes.
My advice is to always use some satin effects when creating metallic layer styles. Read on to learn some Photoshop satin tricks.

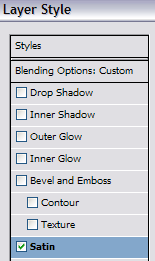
Enable Photoshop Satin options inside layer blending options to add silver reflections.
![]()
A layer with a default "Gun metal neutral" Photoshop style.
![]()
After adding a satin effect (multiply mode, steep slope contour), the same layer style looks like silver due to the contrasting chrome reflections throghout the whole metallic surface.
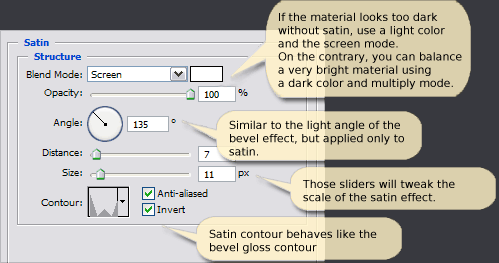
Satin tutorial: Photoshop satin layer options explained

Take into account these tricks and follow these simple steps when creating satin layer effects in Photoshop:
- Apply satin effects after having completely defined the bevel and emboss effects.
- Satin effects are very flexible. If your style is currently too dark (like obsidian), try to lighten the whole look and feel using a light satin color with screen blending mode. On the contrary, if your previous metal was too light (like silver), use darker reflections by selecting a dark satin color and a multiply blending mode.
- Drag the satin opacity slider if the satin effect is too intense and hides other bevel lighting or gloss effects.
- The satin effect accepts any contour shape: as it simulates virtual reflections from the environment, the satin contour may be as complex as you like.
- The invert checkbox is useful to experiment how would the Photoshop satin look if the bright and dark areas were swapped: it’s a quick way to experiment.
- The reflections added by the satin effect should be somehow blurred, abstract and subtle. Adjust the satin distance and size sliders till the shape of the satin blends smoothly with your silver chrome metal.
Now that we have completely configured the silver chrome reflections let’s learn how to clearly define the border of the shapes with Photoshop stroke.
The starting point: a dull metal style with no Photoshop satin effect at all.
![]()
The same style now looks like a silver metal thanks to the satin effect: a 3 peaks contour and a light color in screen mode.
![]()
The same silver satin style, checking the "invert" option, swaps shadow and highlights creating a whole new effect.
![]()
The satin size can be easily adjusted using the sliders, strongly changing the resulting metal effect, rendering a new world of automatic environment reflections.
![]()
Using a dark satin color with multiply blending mode creates a dark obsidian effect instead of silver chrome.

